Super simple client side validations using Parsley JS
No html form in a web page is complete without client side validations.
The easiest way to do it is using Parsley JS.
Lets take a look step by step on how to add parsley js to a form.
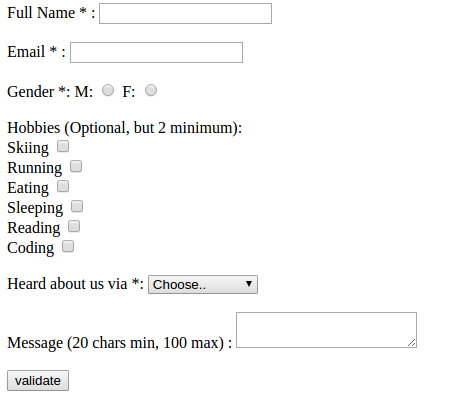
Lets say you have simple form like this :
It will look like :

Now to add Parsley JS to this form you need to include :
- jQuery (dependency of parsley js)
- Parsley JS file
- Parsley CSS file (for some styling) (Download it from Parsley JS Bundle)
To make a form to use parsley, you need to add data-parsley-validate attribute to the form tag and add required attribute to all the elements which you want to make mandatory for the end user.
There are many other built-in validators as well, like you can check a field for only number inputs or check for min length, max length, check for a specific patterns etc. For a detailed set of available options refer : Build-in Validators
Next, you need to call the function parsley() in the form object like this :
$('#demo-form').parsley();
After adding all the above mentioned stuff, the form will look like this :
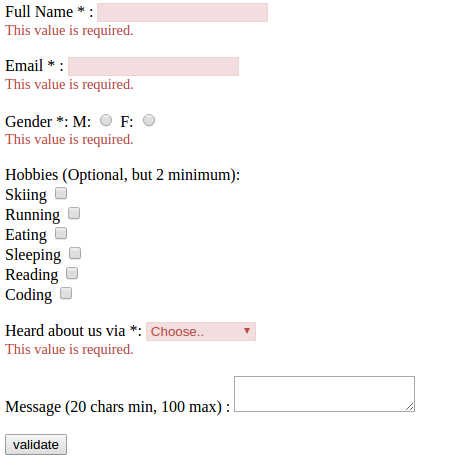
After you click on validate, it will look something like this :

There are some parsley functions that you need to keep in mind which I found very helpful :
-
Let’s say at any given time if you want to validate a form either on click of a button or something else, then just call the
validate()function on that form.$('#demo-form').validate(); -
Let’s say at any given time if you want to check if a form is valid or not, then just check it by using
isValid()function$('#demo-form').isValid()
isValid() will return true or false depending on user’s input entered in the form.
There are lots of examples in their example section, do check it out for more at Parsley JS Examples page.
For their detailed documentation refer Parsley JS Documentation.
That’s how simple it is to integrate parsley js to a html form. I hope you found it useful.